- Explanation: This kind of product includes many simple products. The collection of various products with different options of colors and sizes but each single product has a separate SKU
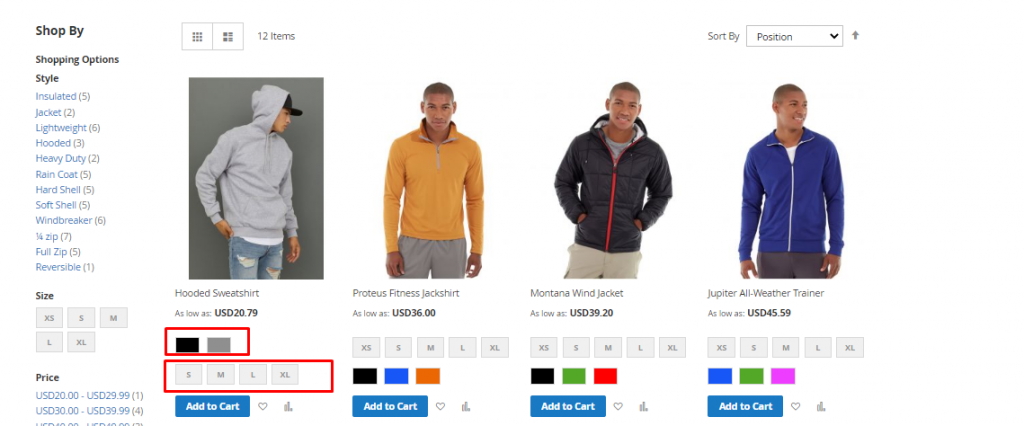
Example: For instant, one of Configurable Products is a kind of clothes coat such as following Stark Fundamental Hoodie product with 3 colors and different options size to choose, compare between them
How to Create Configurable Product in Magento 2 –
https://drive.google.com/file/d/1Em_jvrxhBBTziX-Q08JscHMf-gxhy3pX/view?usp=sharing
Create Configurable Product in Magento 2 by following the steps below.
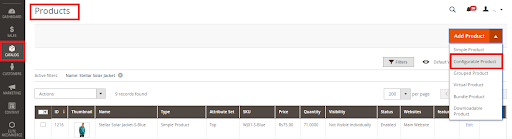
- On the Admin sidebar, Catalog >> products
- In the upper-right corner on the Add Product menu, select Configurable Product
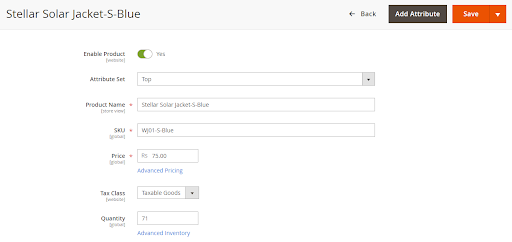
- Enable Product >> Yes
- Attribute Set >> you can select from the Default attribute or create New Attribute.
Example: New attribute can be created, Color >> you can add various options to it ( Red, Orange, Blue, etc.). In case, you need to create a new attribute, Weight, You can add options like 1Kg, 2 Kg, 5Kg, and 10 Kg. So a ‘Rice bag’ will be a product, will have ‘weight’ as a configuration with 1Kg, 2 Kg, 5Kg, and 10 Kg as options.
- Enter Product Name , SKU, Price, Tax Class, Quantity, Category,

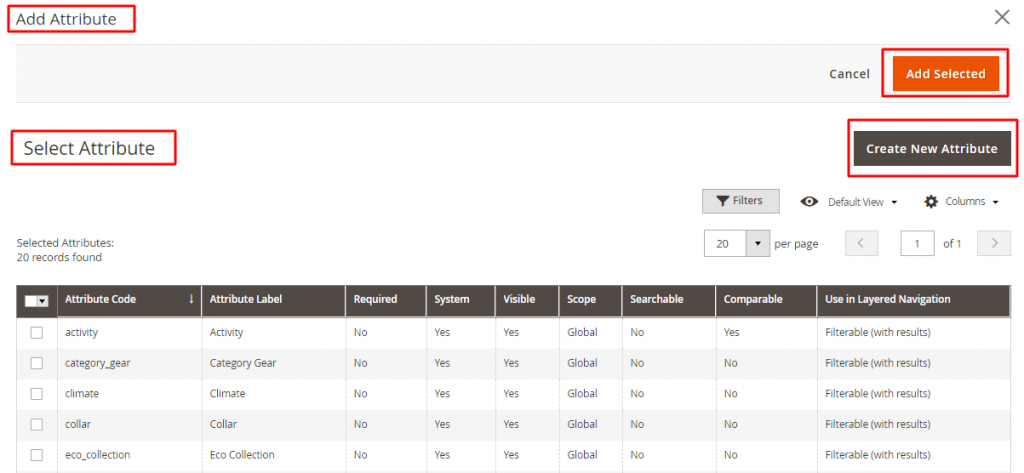
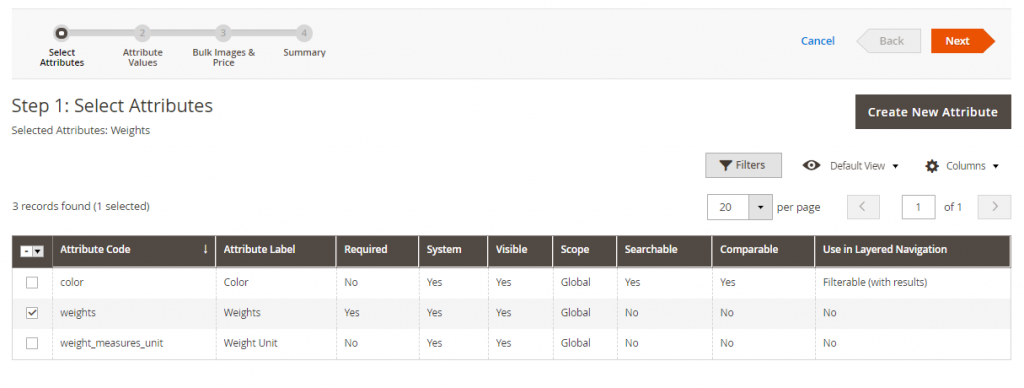
Step 1: Select the Attributes
- At the bottom of Product Details, expand the Configurations section. Then, click on Create Configurations.
- Mark the checkbox of each attribute that you want to set.
- If you need to add a new attribute, go to click on Create New Attribute, and Save Attribute after completing the attributes properties. Then, mark the checkbox to select the attribute.
In the upper-right corner, click on Next.
Step 2: Enter the Attribute Values
- Mark the checkbox of each variation of the product.
- Add a new value by clicking Create New Value. Enter the value of the new input, then click on the Enter arrow.
- Do the same to each attribute you have chosen before. The order of attributes can be rearranged by dragging-dropping to a new position. In the upper-right corner, click on Next.

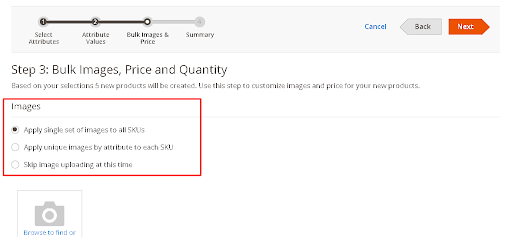
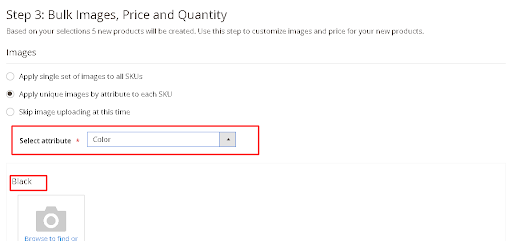
Step 3: Configure the Images, Price and Quantity
The images, pricing and quantity will be set in this step while you can choose only one option for each of them. It is possible to select the same or unique setting or you can skip the setting for now. Choose the configuration options that apply.
3.1. Configure the Images
Method 1: Apply a Single Set of Images to All SKUs
- Choose the desired image from your browse.
Method 2: Apply Unique Images for Each SKU
- Select Apply unique images by attribute to each SKU.
- Select the attribute, for example: color. If your shopper chooses a specific color, the image will appear.
- Allow uploading different images for each attribute, either browse to the images or drag them to the box. If you want to delete the image, click on the bin icon.
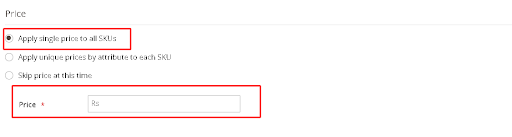
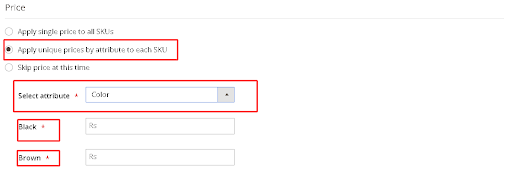
3.2. Configure the configurable product price
Method 1: Apply the Same Price to All SKUs
- Select Apply single price to all SKUs.
- Enter the Price.
Method 2: Apply a Unique Price for Each SKU
- Select Apply unique prices by attribute to each SKU.
- Select the attribute you want to offer a specific price.
- Enter the Price.
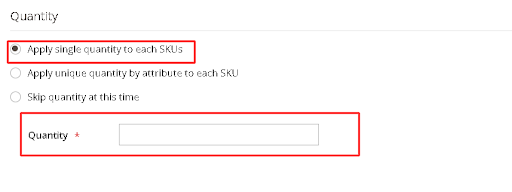
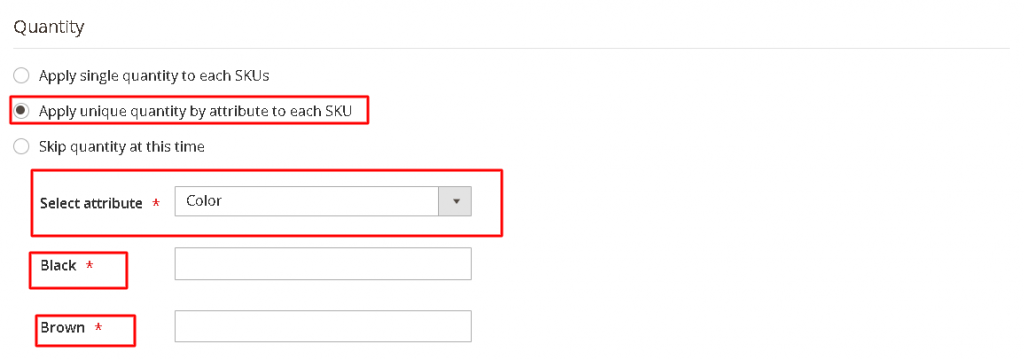
3.3. Configure the Quantity
Method 1: Apply the Same Quantity to All SKUs
- Select Apply single quantity to each SKU.
- Enter the Quantity.
Method 2: Apply a Unique Quantity by Attribute
- Select Apply unique quantity by attribute to each SKU.
- Enter the Quantity
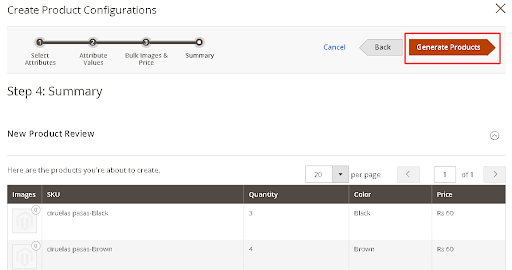
Step 4: Generate the Product Configurations
- Click on Generate Product to add the product to your catalog.
- The product variations now appear at the bottom of Product Details in the Configuration section.
- If you want to edit or remove the product, you can remove the product by clicking remove product.
Step 5: Publish the Products
- Enable the Product Online to the On or Off depending on whether you are ready or not to publish the products in the catalog.
- On the Save menu, choose Save & Close to finish generating.
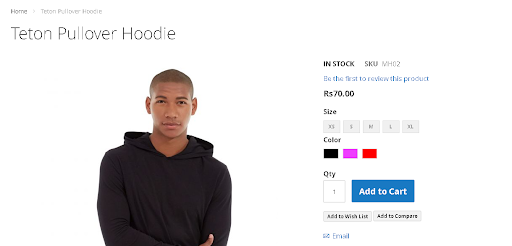
Example: Hoodie is created as a Configurable product with color as the attribute.
It has 3 configuration options: Black, Pink ,Red
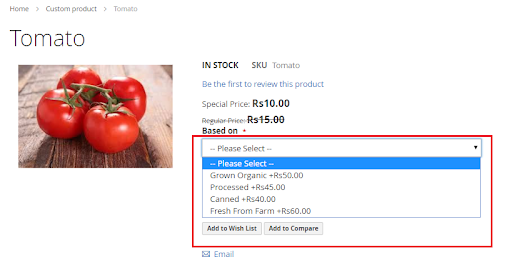
How to Configure Product Custom Options in Magento 2
Creating product custom options
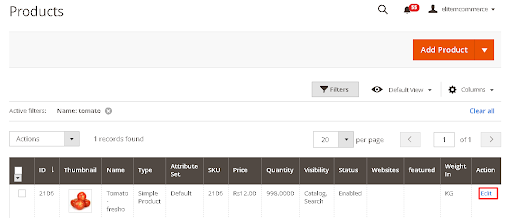
- Goto >> Catalog >> Products
- Click on the Edit link of specific product
- Click on Customizable Option
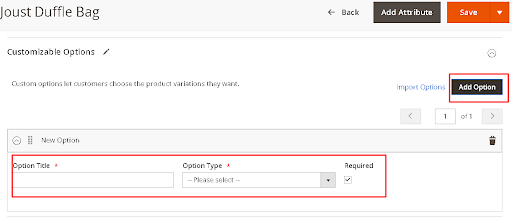
- Click on the Add New Option,
- Name for the Option Title
- Select the Input Type from a dropdown list.
Mark the Required checkbox if you find the option necessary.
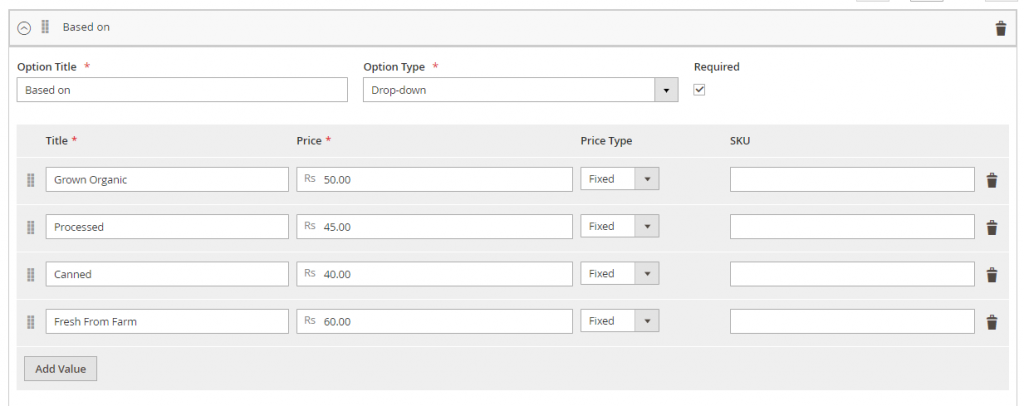
- Complete all of the above, do the following:
- Insert the Price for the option
- Choose the Price Type: Fixed or Percentage.
- Name the SKU for the option.
- Allow rearranging any option as you need, hit the Sort icon to drag it to the new place.
How to add different contents for different language (store view)?
- After the product creation, select the STORE VIEW and provide relevant contents in respective language – Product name and Description details.
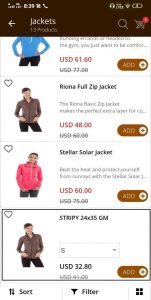
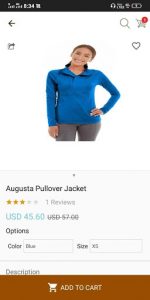
How Configurable Products will be shown in the Mobile App?