Area-based address form
The Area Based Delivery slot will be created in Web Admin and it will be used from the website front end and Mobile Application.
Creating a New Area
- Login to web admin
- Click on the EliteMCommerce Menu to view the Sub Menu.
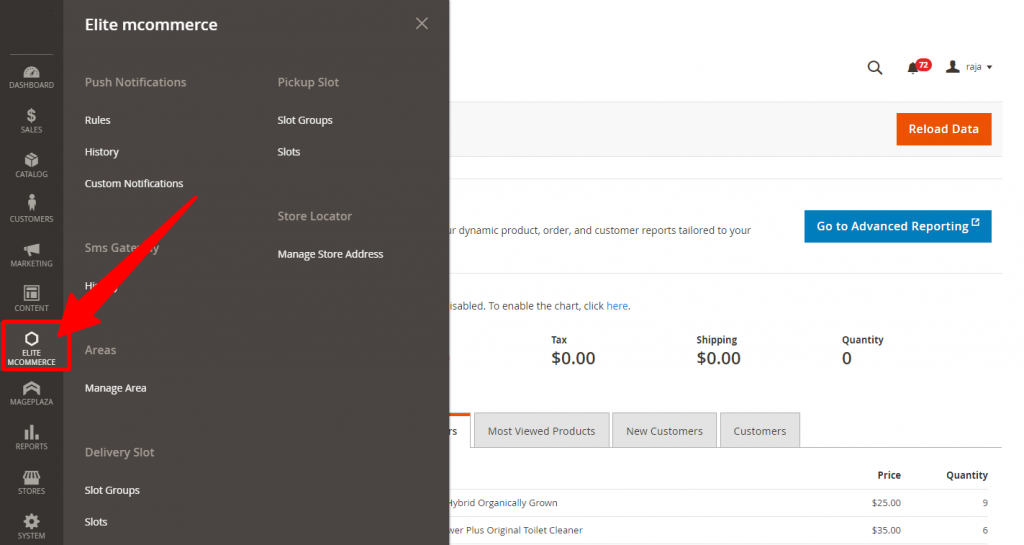
3.Now click on the “Manage Area” button to view the Manage Area Screen.
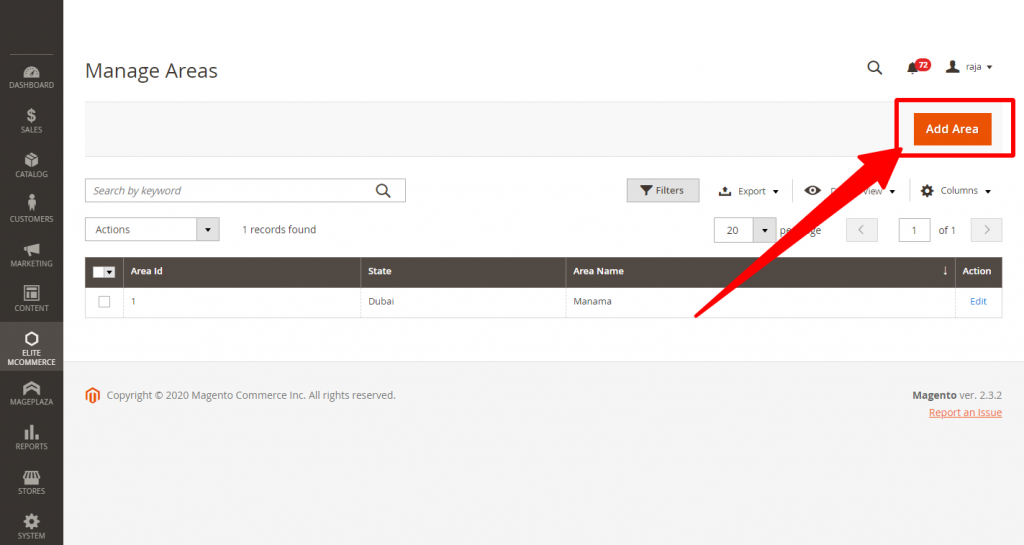
4.Now click on the “Add Area” button to add the New Area.
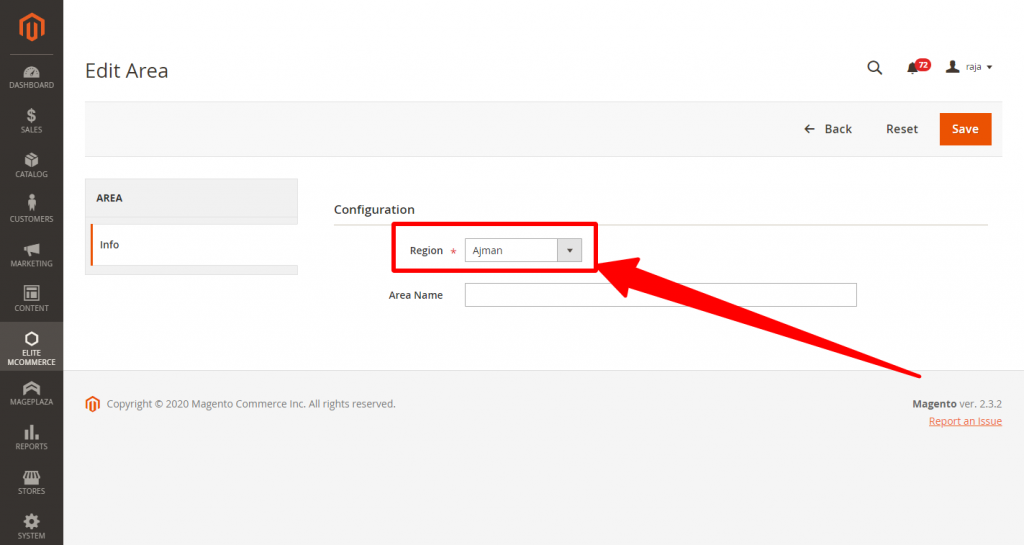
5.Now select the Region from the Drop Down menu.
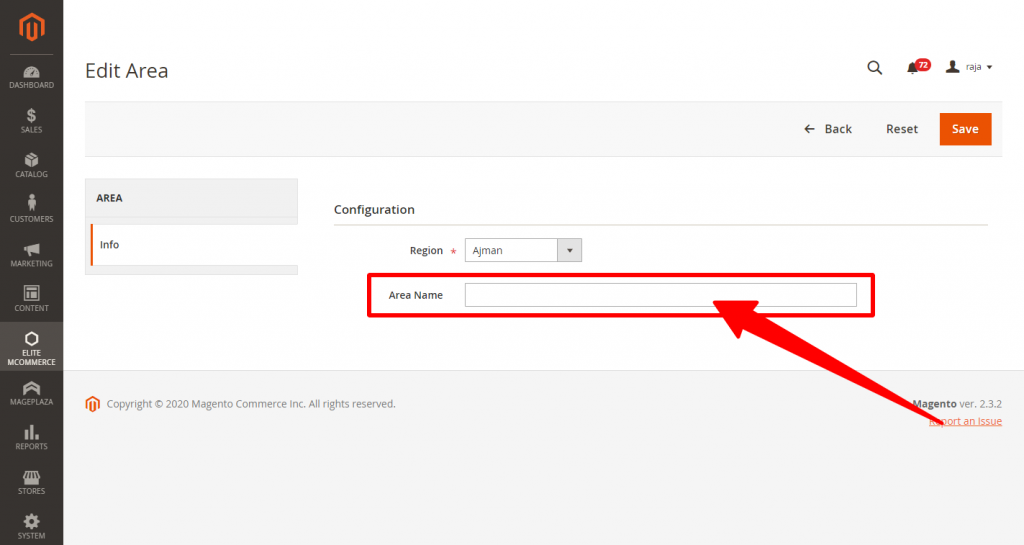
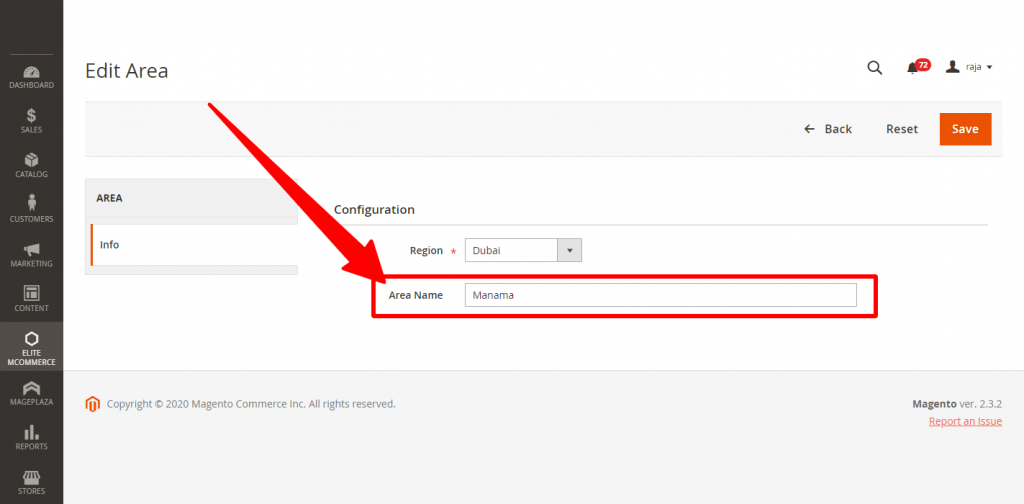
6.Now Enter the Area Name in the Area Input Field.
7.Now click the save Button to save the created Area.
Configure Area Based Delivery
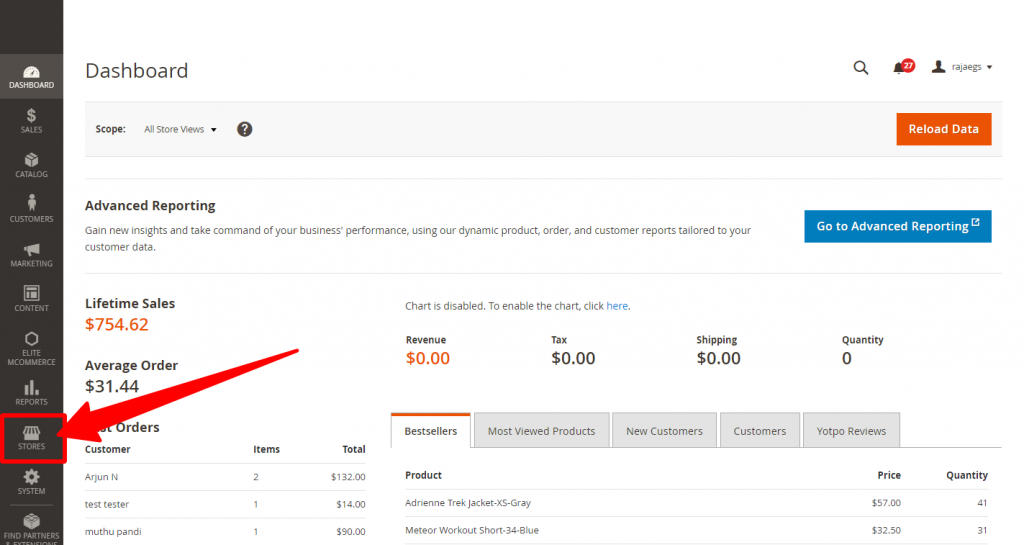
8.Click on the Stores menu to view the Sub Menu
9.Click on the Configuration Menu to view the Configuration Screen
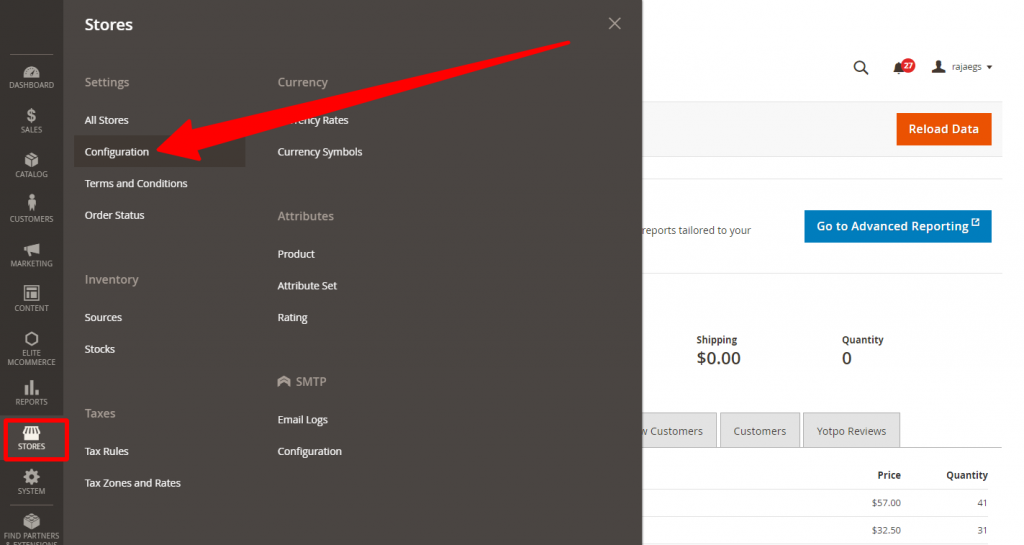
10.Click on the Elitemcommerce Menu to view the Delivery slot configuration.

12.Click on the DeliverySlotPro Configuration
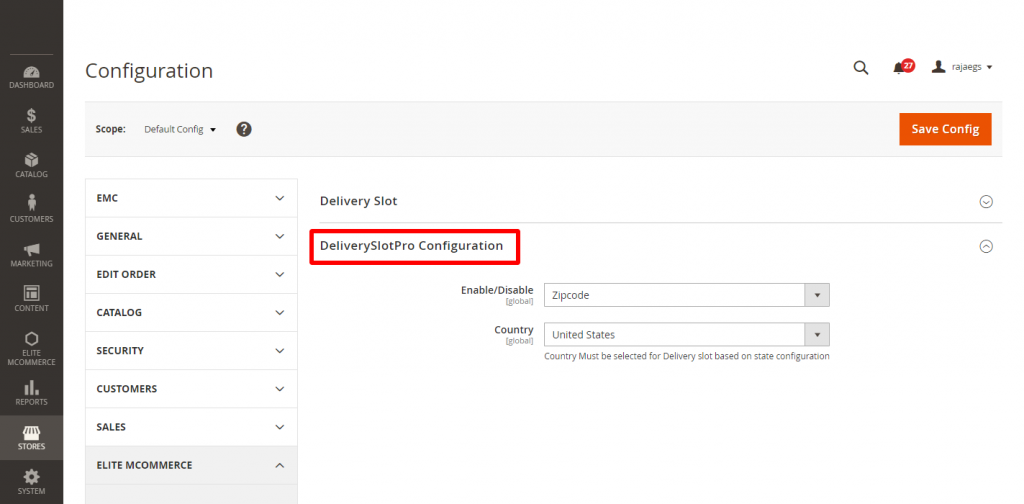
13.Click on the Enable / Disable Dropdown

14.Select the Country from the Dropdown
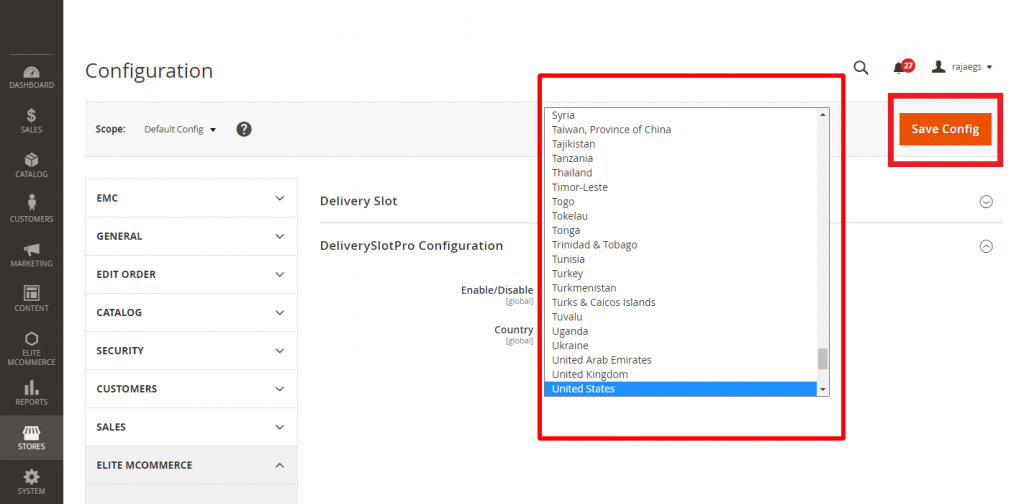
15.Click on the Save button to save the changes in the Delivery slot configuration page.
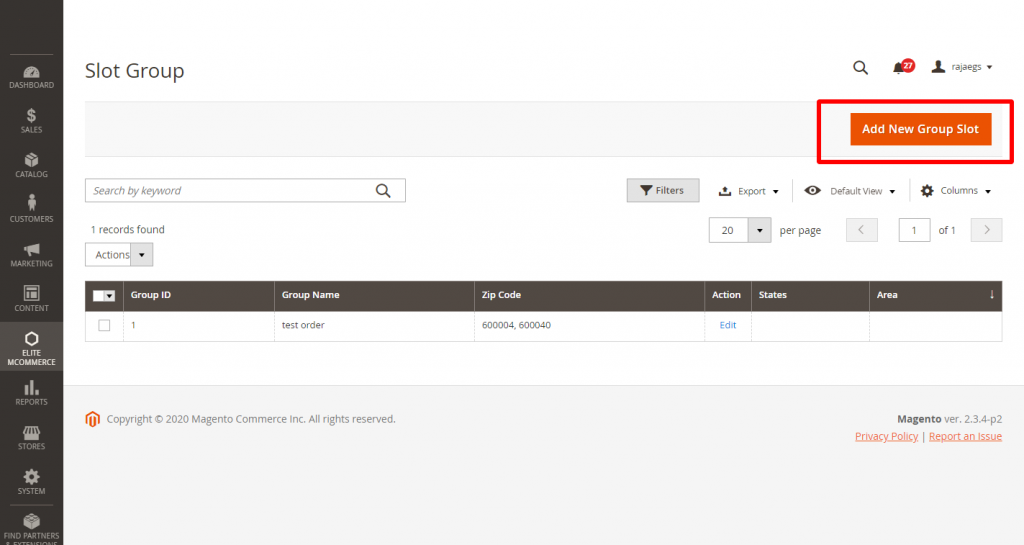
Delivery Slot Groups
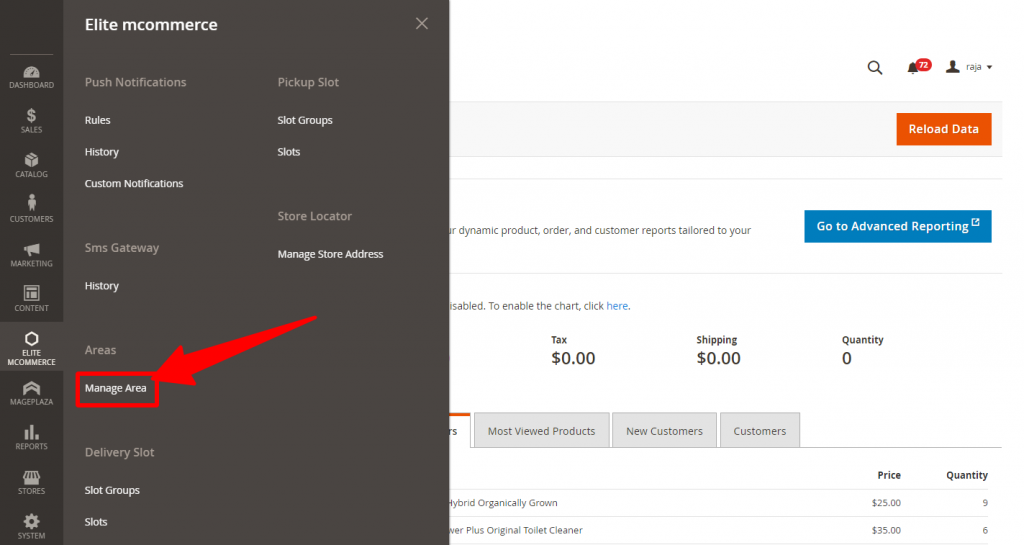
16.Click on the Elitemcommerce menu to view the Sub Menu

17.Click on the Delivery slot groups
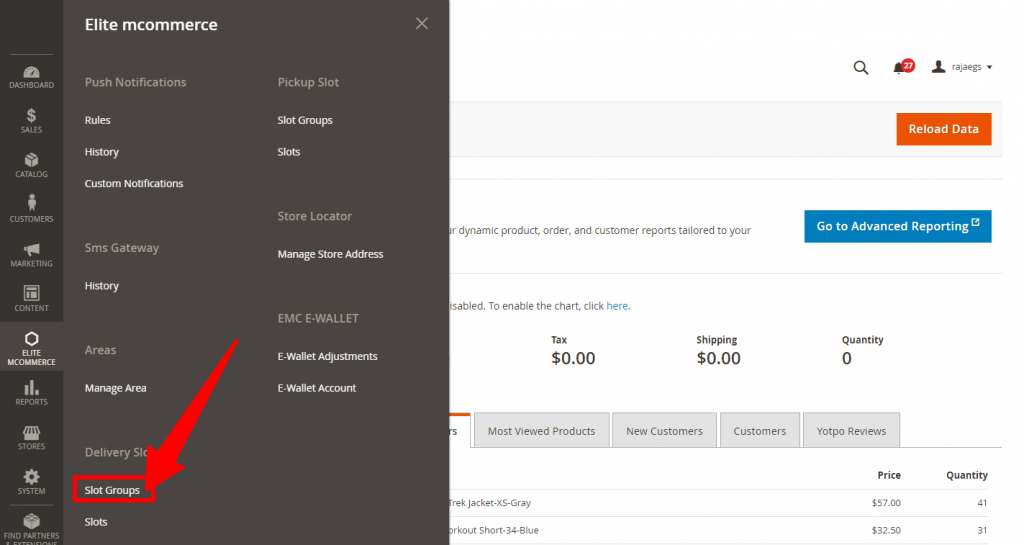
18.The Delivery slot list screen will display.
19.Click on the “Add New Group Slot” button
20.Now Enter the Group Name in the Group input Field2
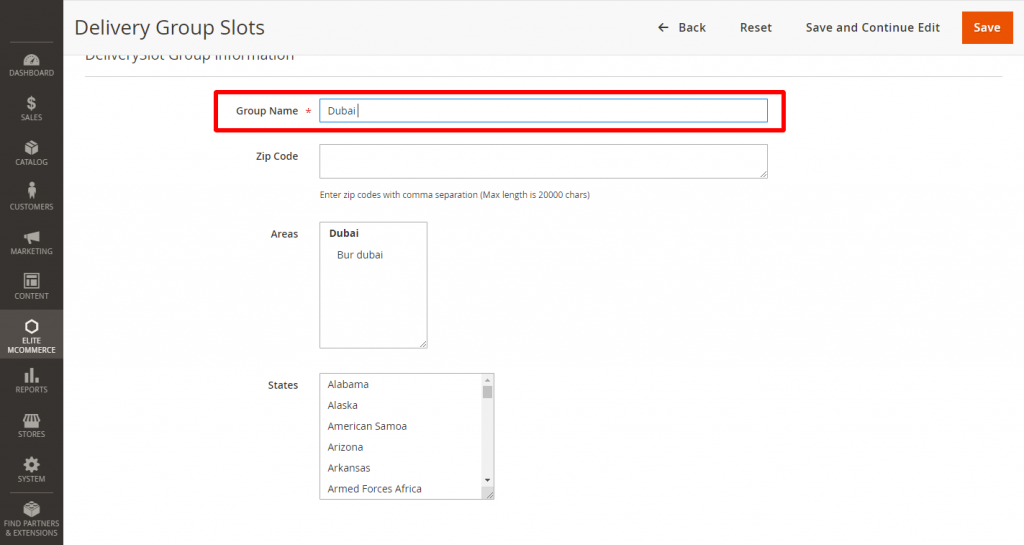
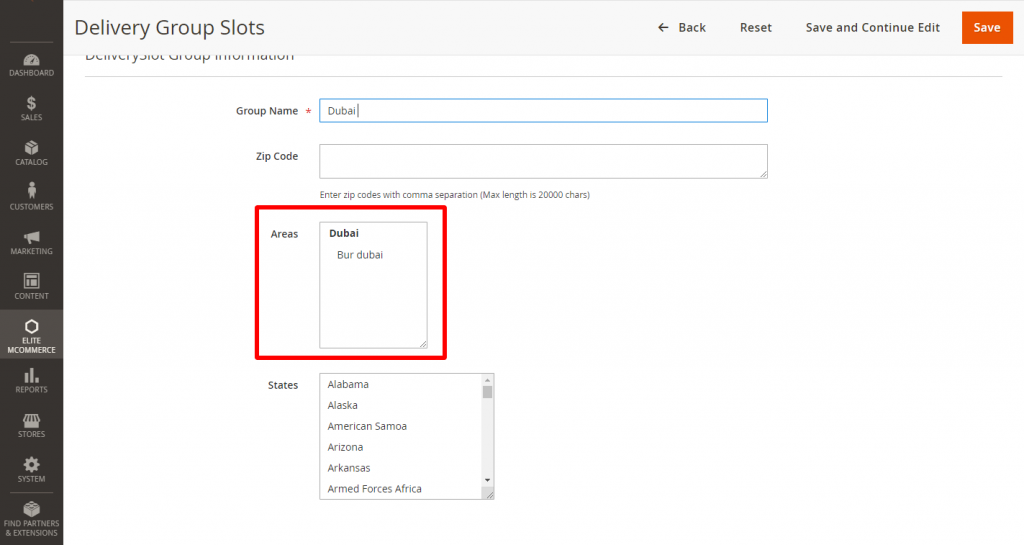
21.Select the Already Created Area Names from the Area Field
22.Now select the States related to the Selected Area.

23.Now click on the save button to save the Selected Delivery Slot Area.
Website Front End
24.Now Loginto website front End with user login Credentials.
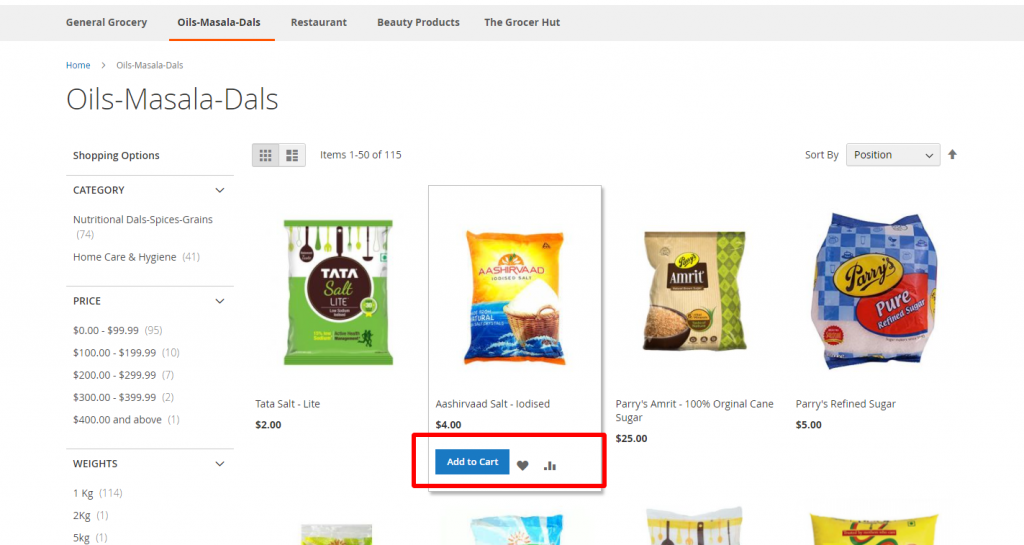
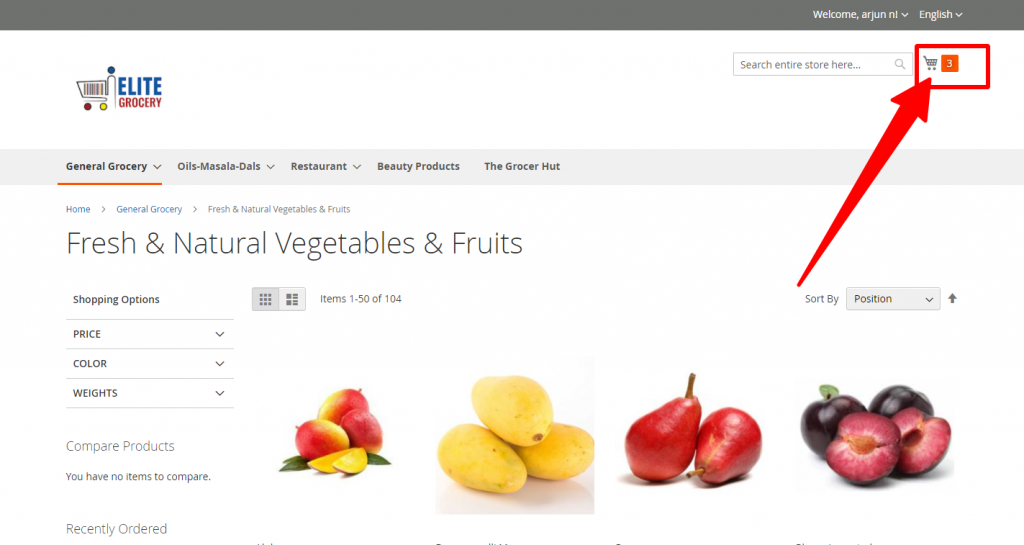
25. Now Add any product to cart.
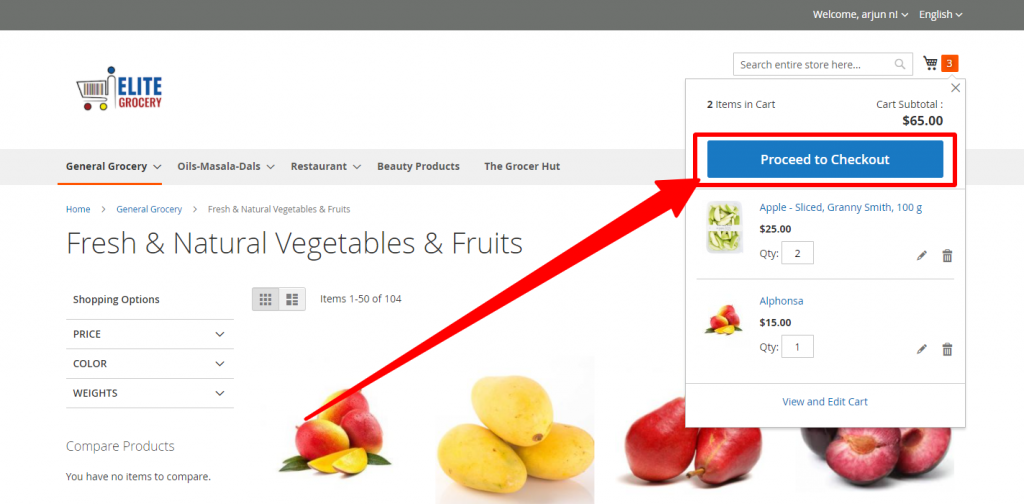
26.Now click on the cart icon to view the Mini Cart.
27.Now click on the “Proceed to checkout” button to view the “Checkout” page
28.Select the “Shipping Method” from the Shipping Method list.

29.Now click on the “New Address” button to add a new Address.
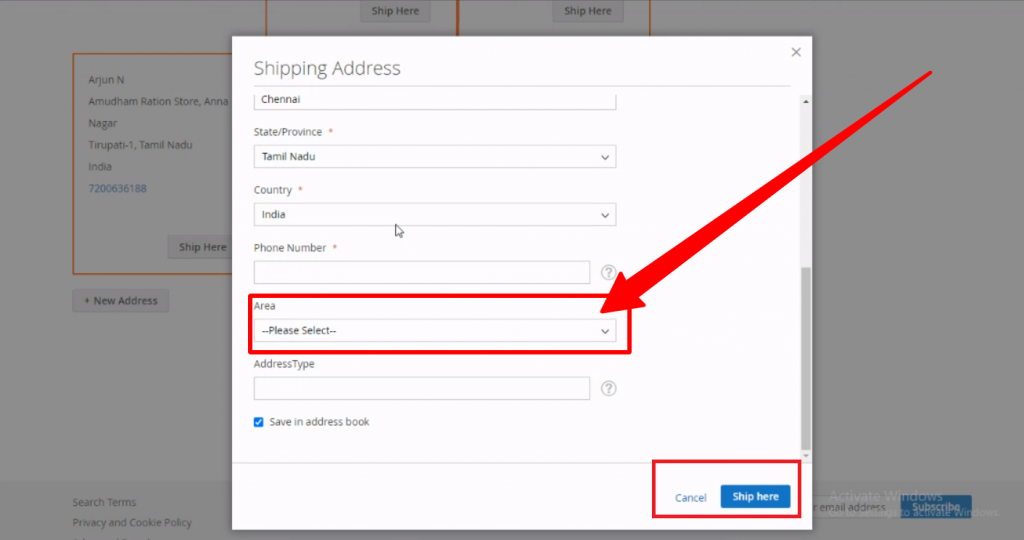
30. Now fill the “Shipping Address” Form Fields.
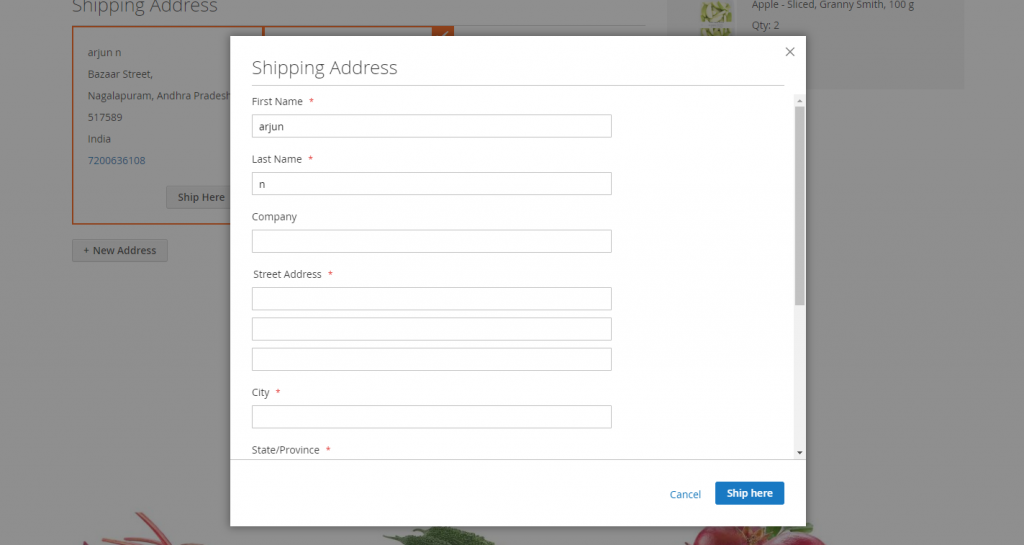
31.Fill the “First Name, Last Name, Field.
32.Fill the “Street Address” Fields.
33.Now click on the Country dropdown field and select Country from the dropdown.
34.Now click on the State dropdown field and select State from the dropdown.
35.Now Fill the City field and Fill the Phone Number.
36.Now click on the Area dropdown to Select the already populated Area.
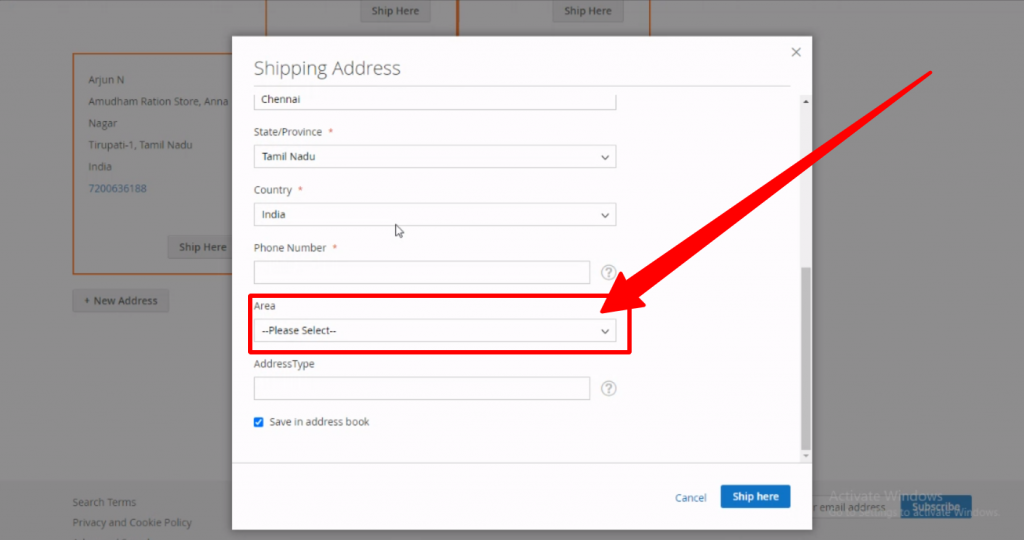
37.Now enter the Address Type and click the “Ship here” Button to save the added Address.
38.Now click the “Next” button to Navigate to Checkout – Payment screen.
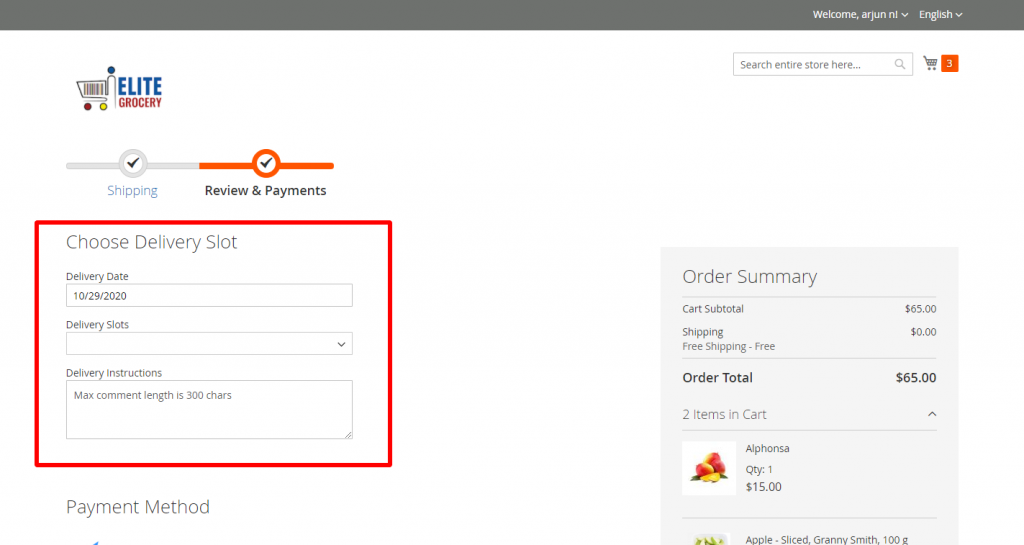
39.Now select the Delivery Date and Delivery Slot.
40.Now select the “Payment Method” from the Payment Method list
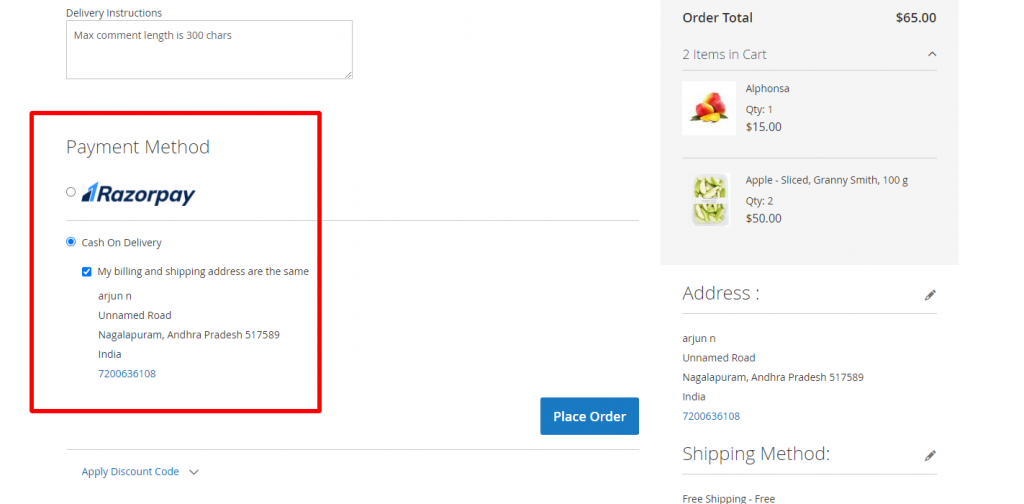
41.Then click on the “Place Order” button to place the Order.
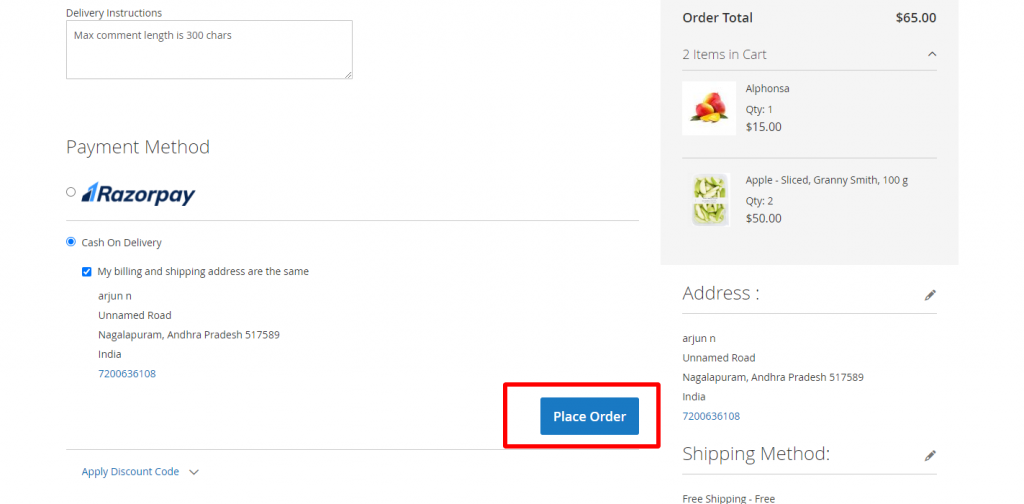
42. By clicking the “Place Order” button the Order gets placed with an added Address.
User Mobile App
43.Install the User Mobile App and log in with user login details.
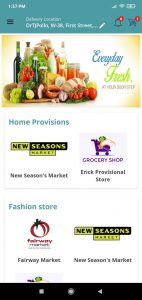
44.Click on the Store image to view the Categories.
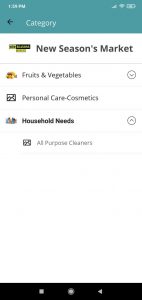
45.Now click on the Category name to view the Subcategories.
46.Now click on the Subcategory to view the products.

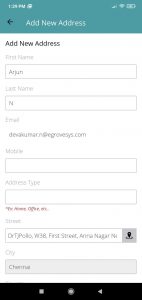
47. Now click on the product image or title to navigate the Details screen.
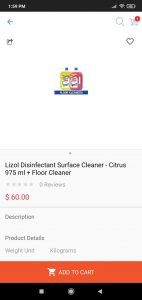
48.Now click on the “Add to Cart” button to add the products to the cart.
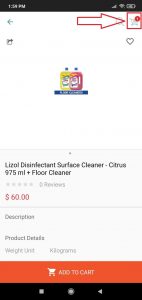
49. Now click on the cart icon to navigate to My Cart Screen.
50. Now Click on the “Proceed to Checkout” button to navigate to the checkout screen.
51. If there is no address is added with the respective account, then the Add Address screen will appear.
52.Now Enter the Details in the Address form.
53.Fill in the First name, Last name, Mobile Number, Address type, and Street details fields.
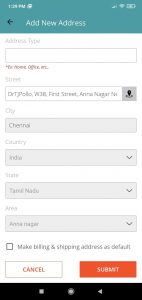
54.Now select the Country, State, and city from the Dropdown fields.
55.Now Select the Area from the Dropdown field and click on the Save button.
56. After clicking on the “Submit” button the Checkout screen will appear.
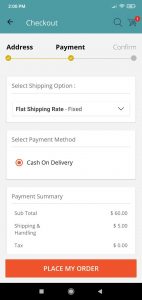
57. Now click on the “Proceed to Payment” to view the Checkout – Payment screen.

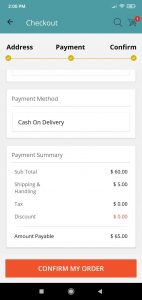
58.Now select the Payment method and click the “Place My Order” button to confirm the Order.
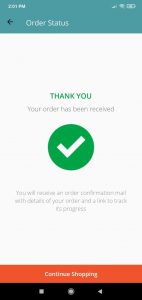
59.Now click on the “Confirm My Order” to confirm the Order.
60.By clicking the “Confirm My Order” button, the order confirmation screen will get displayed.
61.The Order gets placed with an Already selected Area.