What is Payment Authorisation?
Payment authorization is confirmation of a cashless payment by a customer. It is given during a payment transaction, for example when using a credit or debit card. It may involve the customer entering a PIN in a card terminal.
Merchants use payment authorization to obtain a promise of payment from the issuing bank. This involves checking the card to make sure that it has not been blacklisted or has exceeded its credit limit, and the validity of the PIN is verified.
What is Payment Authorisation and Capture?
Credit card capture or authorization capture takes place after a payment authorization. It’s when the authorized money is transferred from the customer’s account to a merchant’s account. So, in short, the transaction amount doesn’t reach the merchant account until the funds are captured
How does it work with your application?
When a Cashless transaction is made, the payment processing goes through two stages:
- The credit card authorization — This is when the transaction is verified by the credit card company. They check the customer’s credit card validity and whether they have sufficient funds for the transaction. When everything’s fine, the transaction is then authorized and the total amount of transaction is deducted and held from the customer’s credit line account. Note that the money is not transferred to the merchant account yet. This is when credit card capture comes in.
- Credit card capture — This is when a merchant “tells” the credit card company that transaction has been completed between them and the customer. Now, money can be transferred.
HOW TO CONFIGURE THIS WITH DIFFERENT PAYMENT GATEWAYS:
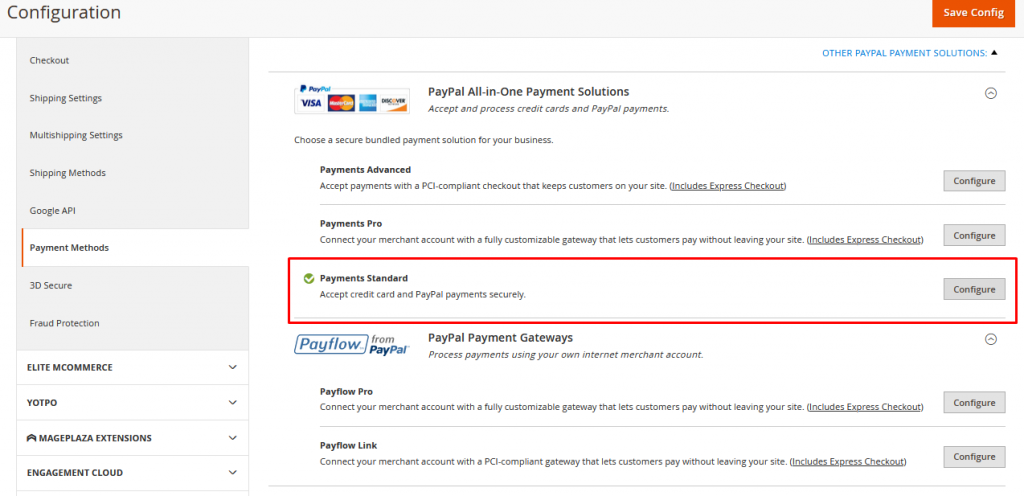
STEP 1: In Paypal Configuration
Navigate to Store → Configuration → Change the Scope to”Main Website” → Sales → Payment Methods → Go to Paypal Section and Click “Configure” – “Payments Standard”
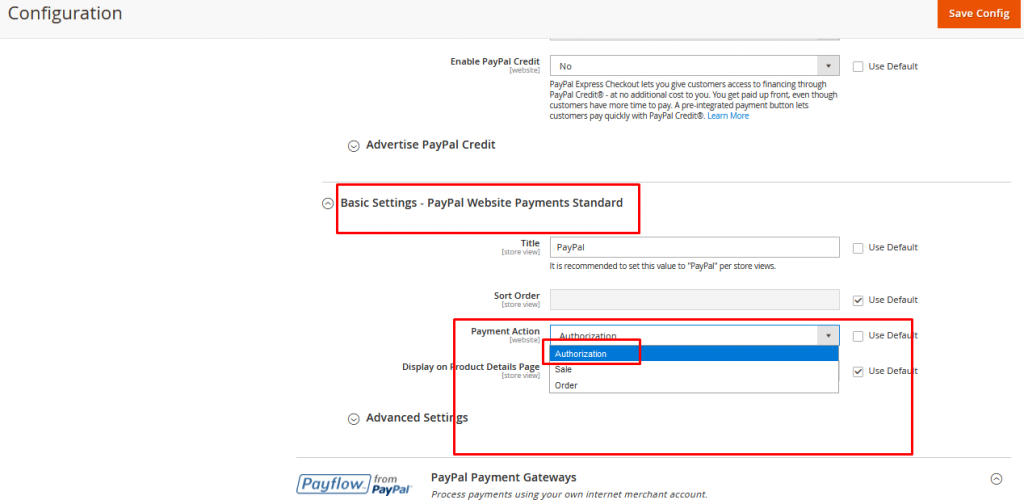
2.Go to Basic Settings- Paypal Website Standards → Payment Action → “Authorization” (should be selected from Drop down)
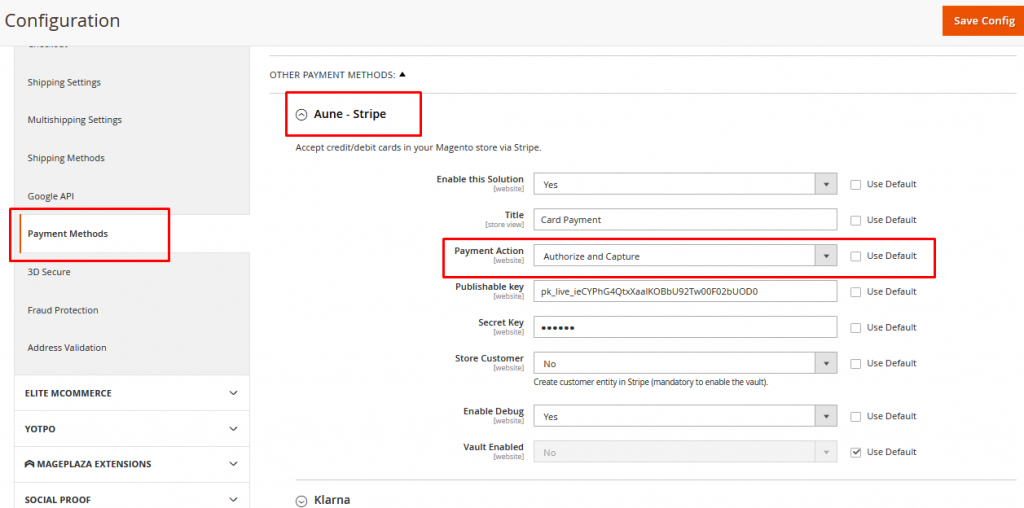
STEP 2: In Stripe Configuration
1.Navigate to Store → Configuration → Change the Scope to”Main Website” → Sales → Payment Methods → Go to “Aune-Stripe” Section and Click drop down → Select Payment Action as “Authorize and Capture” → Save Config
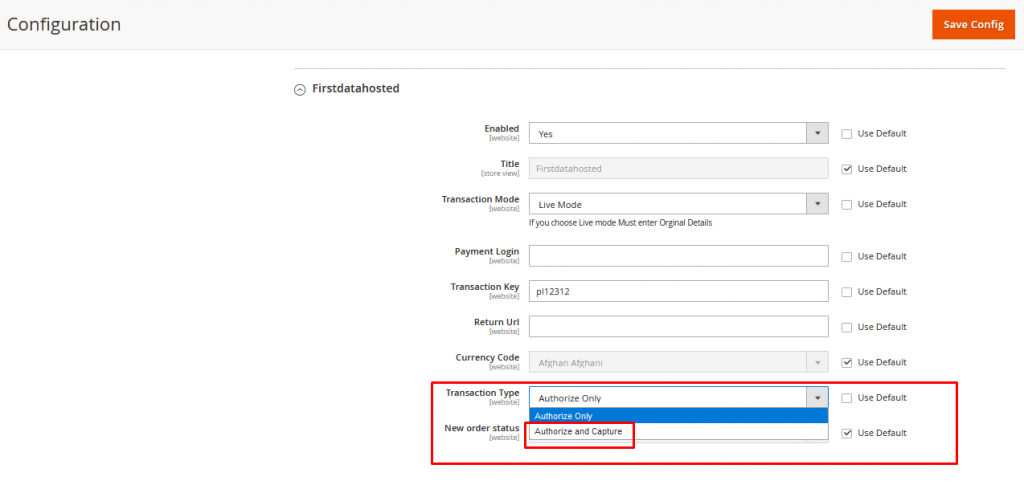
STEP 3: In Firstdata Hosted Configuration
Navigate to Store → Configuration → Change the Scope to”Main Website” → Sales → Payment Methods → Go to “Firstdatahosted” Section and Click drop down → Select Transaction type as “Authorize and Capture” → Save Config
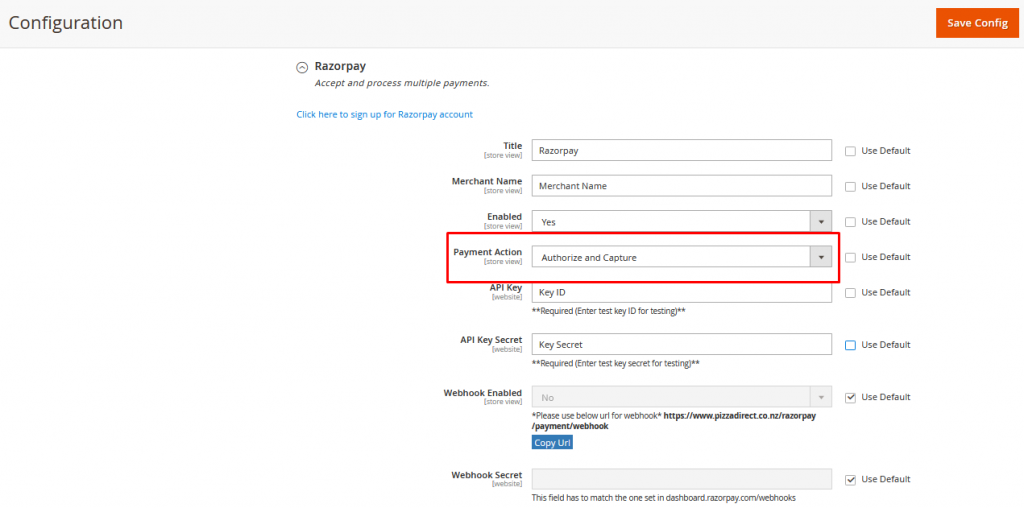
STEP 4: In Razorpay Configuration
Navigate to Store → Configuration → Change the Scope to”Main Website” → Sales → Payment Methods → Go to “RazorPay” Section and Click drop down → Select Payment Action as “Authorize and Capture” → Save Config